Gluten-Free Classic Chicken Piccata
Oh my God! I have to make something gluten-free? What the heck is gluten? Is it dangerous? Are these gluten-free people in some sort of a cult? Who are these nutty people? You may think that people who say “I don’t or can’t eat gluten” are on some fad diet or something. No, it is a real problem! It is a lifelong food challenge for a loved one or a friend with Celiac disease or are highly sensitive to gluten.
I had to cook for my new sister-in-law and decided to do some research. So, I studied gluten for a couple of days and realized it’s not that hard to make the adjustments. The hard part has been to make up for what you lose in a dish using “Certified Gluten-Free” products. Many of us have friends or family who are sensitive to gluten. I wanted to make my “Classic Chicken Piccata” recipe into a gluten-free option since my brother's wife suffers from Celiac disease. However, I still wanted everyone else to enjoy the recipes taste and appearance without knowing the difference. Adding and making a few small ingredient changes and additions can make up for the lost flavor profile and food presentation you may lose using gluten-free ingredients.
To save you the two days I spent studying, please take the time to read the “About Gluten” section and it will help you when you go shopping. This one’s for you Susan!
About Gluten
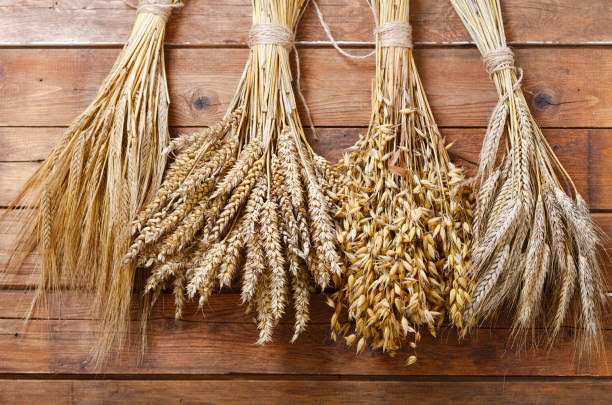
What is Gluten? Gluten is simply a protein group found in grains like wheat, barley and rye. In traditional cooking, it acts like an invisible, stretchy web that helps dough rise and gives bread and pasta its signature chew. In skillet recipes like pan sauces and dredges, wheat flour is commonly used for browning and thickening. Luckily, swapping wheat flour for a 1-to-1 Gluten Free Flour Blend adding some cornstarch for helping brown the chicken will keep your cutlets golden brown without sacrificing flavor.
Watch out for hidden Gluten! Going gluten-free isn’t just about swapping the flour. Gluten can sneak into everyday pantry Staples under technical names or through shared factory equipment. Look for terms like Yeast Extracts & Autolyzed Yeast and Maltodextrin & Flavorings on the package.
Shared equipment (cross contamination): Standard products might contain safe ingredients but are processed on the same lines as wheat based foods. This can easily occur in your kitchen, on the grill or anything you have used to previously make a gluten containing food product. All kitchen equipment should start clean and fresh this includes kitchen towels. If you are making a gluten-free dish for someone at your party, always make it before you make the other dishes you are planning.
The Solution: Look for the “Certified Gluten-Free” seal To ensure a recipe is 100% safe for Celiac disease or high gluten sensitivity, don’t just rely on a standard “gluten free” label, this is where they sneak those little ingredients in. A “gluten-free” label, under FDA regulations, says a product must contain less then 20 part per million of gluten. A “Certified Gluten-Free” label product must contain under 10 ppm or in some instances under 5 ppm of gluten. So, this is not hard. Look for the “Certified Gluten-Free” label on all your food purchases and be aware these GF label can be hidden on the packaging. This guarantees the product has been deemed independently tested and verified clean of gluten.
About the recipe
Gluten-free Chicken Piccata made using gluten-free options such as certified gluten-free flour, rice flour, cornstarch and certified gluten-free chicken broth is an easy way to make chicken piccata gluten-free for our loved ones or friends who are sensitive to gluten, yet we can add ingredients to keep the flavor of this classic dish. Sauteed chicken in a wine, butter and lemon sauce with capers seems simple but does require some technique to get it right. Follow this recipe paying attention specifically to the flour and broth substitutions and the ingredient additions to make a classic recipe gluten-free taste great.
Whenever shopping for Gluten-free products always look for the “Certified Gluten-free” designation on the package. These are products that will not contain the words wheat, barley, rye or triticale ( a hybrid of wheat and rye) anywhere in the ingredients. Sometimes the phrase “Certified gluten-free” can be hidden on the package so you may need to search for it. Many times, I have looked up gluten-free products but find that although they are “considered” mostly gluten-free but they admit that some of their products may have cross contamination using other small ingredients in it or equipment used to produce it being used. Thus, they cannot label the product “Certified Gluten-free”.
Caution when cooking Gluten-free (Cross contamination)
When cooking this recipe gluten-free we have to be aware that the pre-made products, such as the flour and broth, being used are “Certified gluten free” but, as well, being aware of cross contamination in our kitchen.
The kitchen equipment we use to produce our gluten-free recipes must be thoroughly washed and dried using a clean towel. For example, using a kitchen towel to dry a pan you plan to cook your gluten-free dish in, that you have also been using to dry other pans or utensils, or wipe a cutting board with, could result in cross contamination. Restaurants use separate areas and equipment, in the kitchen, exclusive to gluten-free cooking.
Wash all your equipment thoroughly, dry with a fresh kitchen towel, then, cook anything you plan to make gluten-free first. In general, be aware of cross contamination. Ok, enough about gluten! Let’s get cooking!
About the ingredients
Chicken Breasts
Using all clean equipment you will want to fillet the chicken breast into cutlets. Cutlets will give a nice balance of sauce to chicken ratio for the perfect flavor. Filet the breast and cover with plastic wrap. Using a mallet, pound the chicken starting on the fat end and working the meat to the thin end so the cutlet is an even 1/4 inch thick. The plastic wrap actually helps form the breast even thickness when pounded.
Gluten-Free Flour and Cornstarch Dredge
Use a gluten-free flour such as "Pillsbury's best gluten-free all purpose flour” or look for a “1-1 blend gluten free flour” this flour gives you the equal measurements of regular flour. Adding one to two tablespoons of cornstarch to the flour will help crisp your chicken cutlet and help the sauce thicken. Also, to help the chicken attain that golden color, add one teaspoon each of paprika and powdered garlic to the dredge. This will help with the final cooked color and help with flavor. These ingredients are optional.
Unsalted Butter and Olive oil (for sauteing)
Combine the olive oil and butter. This gives you a good combination that will give you a high smoke point for sauteing that will prevent burning. Adding in the butter helps the chicken get that golden brown look you want.
Dry White Wine
A dry white wine helps deglaze the pan, loosening the brown flavorful bits that will enhance the sauce. It also adds acidity to counterbalance the rich butter. Use a dry white wine such as Pinot Grigio or Sauvignon Blanc
Substitutions: To make this non alcoholic double the use of chicken stock. You can also substitute with dry white vermouth if you forgot the wine.
Unsalted Gluten-free Chicken stock
Observing the containers of chicken stock for the “Gluten-free certified” designation, use the unsalted chicken stock brand options such as Swanson, Kitchen basics, Progresso or Pacific Foods salt free Chicken stock that are produced gluten-free these add body, savory depth and volume to the sauce. Always use unsalted broth as we want to control the salt content manually. Having salt in a sauce that we are going to reduce, as liquid evaporates, the salt does not, it concentrates in the reduced sauce. This is the importance of using unsalted butter as well.
Fresh Squeezed Lemon Juice
Always use fresh squeezed lemons. They are inexpensive and also make a nice garnish. Lemons give the Piccata that crisp, sharp acidic flavor that defines the dish. Piccata roughly translates to “sharp”. Bottled lemon juice contains preservatives that can give the dish a bitter, metallic flavor when heated
Capers
Capers provide a burst of tangy, floral and salty contrast to the sauce. It also adds some texture and sort of a garnish within the sauce for the dish. Look for nonpareil capers packed in brine (found near the olives and pickles in the grocery store). Rinse them before adding to the sauce.
Cold Unsalted Butter (pan finish)
Cold unsalted butter is used during the emulsification stage of the sauce. We have all seen a broken sauce where butter seems separated from the wine, chicken stock reduction. Using cold butter off the heat, swirled and whisked in keeps the sauce together. The cold butter stage is where most cooks lose the classic chicken piccata presentation. The sauce will become separated. Keep the butter cold until you are ready to use it.
Fresh Parsley & Lemon Slices
Sprinkled parsley adds a nice green color contrast to the dish making it present nicely and the lemon slices make a nice touch either whole sliced adding a couple on top of or alongside the Piccata using wedges.
Garlic Powder (Optional)
If you are not adding the garlic to the dredge and prefer to use it on the chicken, be my guest.You can add a sprinkling of garlic powder onto your pounded chicken breast when you salt and pepper it to help add flavor lost by using the gluten free flour.
Tips for success (what makes this Piccata perfect)
Pat the chicken dry: Before dredging in the gluten-free flour. The moisture on the chicken will make the flour into a paste. Drying the chicken will ensure the flour evenly coats the chicken. I salt and pepper the chicken directly. Salt will begin to draw water out so pat the chicken dry right before you dredge it in the flour.
Why the cold butter matters: Montering or Monter au beurre is the method used to emulsify the sauce. I have heard cooks say “Mount” the sauce as well. Warm butter releases its fat as soon as it hits the hot sauce causing the sauce to separate. Cold butter taken directly from the fridge melts slowly and should be done off the heat! Allowing the milk solids and fat to blend slowly when whisked and swirled into the pan liquid. Montering or Monter au beurre is the method used to emulsify the sauce and give the Chicken piccata its glossy look.
Rinse the capers: Capers are packed in brine or salt. Giving them a quick rinse removes excess sodium so you taste more the tangy flavor of the capers rather than salt.
About salt: “You can add salt but you can't take it out” is the old saying.I have seen many recipes that add salt (and pepper) to the flour. Or salt and pepper to the emulsified sauce before adding capers. I do not do this. I have learned the hard way that you always want to control the salt. Yes, of course I have ruined many dishes by oversalting like anyone else. Mistakes happen. However, I try to make sure salt is mostly manually controlled. Every ingredient, such as salted butter, salted chicken broth and not rinsing capers can all oversalt the dish before you even take a taste. I salt and pepper the chicken directly, press it into the chicken then use a paper towel to dry them and then put it right into the flour and into the pan. Check the need for salt at the end. Now, if you oversalt the chicken? Well, that’s on you. We’ve all done it.
Have all the ingredients prepped and ready: This goes for any recipe you make. Not prepping can cause you headaches of all kinds and sometimes a ruined dish. How many times have you forgotten an ingredient because you didn't prepare them first? I know I have. Don’t you hate when you start cooking a dish realizing you forgot to peel and chop the garlic! Prep first.
Make-Ahead instructions
Prepping Cutlets: You can filet the chicken into cutlets, pound them and store them flat in an airtight container separated by layers of parchment paper up to 24-hrs ahead of time. Do not season or dredge in flour until sauteing.
Partial or advance cooking: A time saver here can be sauteing the cutlets 30 minutes prior to making the sauce. Store on a covered dish at room temperature. Build the sauce before serving. I sauteed the cutlets the day before for a dinner party. Saute the cutlets. Allow them to come to room temperature and store them in an airtight container in the fridge. Take them out of the fridge 30 min before adding to the sauce in the pan and allow them to warm in the sauce. However, you will lose some of the flavor you left in the pan the day before.
Frequently Asked Questions
Why did my sauce break or come out oily?
Sauces break when butter is added over direct, high heat or if the butter was not cold directly from the fridge. You can try to fix this by adding a splash of the cold gluten-free chicken stock and whisk it vigorously until it comes back together.
Can I use store bought chicken cutlets?
Absolutely. This is a time saver however, may cost you a few more dollars. Lay them on your cutting board and check they are even thickness. You may need to pound them.
What if the sauce is too salty?
The simple fix is to toss out the sauce and start over. Simply wash your pan or grab another one and rebuild your sauce using unsalted ingredients, salting at the end to taste. The only loss is the flavors left behind when you seared the cutlets. But, you saved the dish.
How do I make this for a crowd?
Ok, this can be done. I have done it. Saute as many cutlets as you need and place them on a covered platter. Then, multiply the sauce recipe for as many cutlets you made and build the sauce. Then, in small batches, transfer the chicken to the sauce, coat the cutlets, then put them back on the platter. Then, pour the remaining sauce over the platter and garnish. This especially works great if you are using chafing dishes if you made the chicken the night before.
Gluten-Free Chicken Piccata
Serving time and info
Prep time: 15 minutes
Cook time: 20 minutes
Total time: 35 minutes
Yield: 4 servings
Serving size: 1 Cutlet (with 3 Tbsp sauce)
Ingredients
Chicken & Dredge
2 large boneless, skinless chicken breasts (cut horizontally into 4 thin cutlets)
1 tsp each Salt and freshly ground black pepper (or to taste)
1 cup Gluten-free all-purpose flour or 1:1 Gluten-free flour and add 2 tbsp cornstarch
1 tsp paprika (Optional added to the flour to aid in coloring)
1 tsp garlic powder (Optional to the flour to add flavor)
Sauteing
2 tbsp unsalted butter
2 tbsp olive oil
The Pan Sauce
1/2 cup dry white wine (Pinot Grigio or Sauvignon Blanc)
1/2 cup Certified gluten-free chicken stock (like Swanson or Pacific food’s)
1/4 cup fresh lemon juice (1 to 2 lemons reserved in a measuring cup)
3 tbsp capers, rinsed and drained
5 tbsp unsalted butter ( 2 tbsp for the saute and 3 tbsp cold for the the sauce)
Fresh parsley, chopped (for garnish)
Thin lemon slices (for garnish)
Note: If you plan to make a gluten-free pasta to go with your Piccata you should increase the liquids to 1 cup each)
Recipe
Step 1. Prep and pound tenderizing the chicken
On a cutting board using a sharp knife, filet the chicken breasts.
Cover the cutlets with plastic wrap and pound to 1/4 inch thickness
Season both sides with salt and freshly ground pepper and press into the chicken (You can use the garlic powder to enhance flavor lost to the gluten-free products but this is optional)
Step 2. Dredge
Spread the flour/cornstarch mix onto a shallow high rimmed dish or plate (add the optional paprika and garlic to the mix)
Pat the chicken dry (don’t skip this step)
Heat your pan on medium-low heat and add the oil and butter.
Dredge each piece of chicken into the flour/cornstarch mix pressing it to coat both sides. Shake off excess flour prior to placing it in the hot pan.
Step 3. Sear the chicken cutlets
The oil/butter in the pan should be shimmering. Add the chicken cutlets in a single layer and do not over crowd the pan (work in batches to avoid overcrowding the pan)
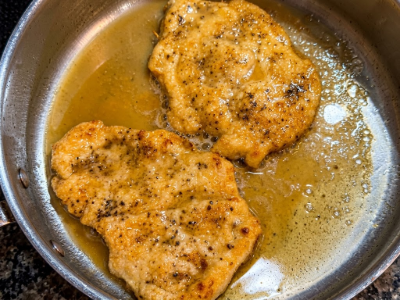
Saute the chicken for 2-3 minutes per side lifting a corner to check sear and cook until golden brown (It may be difficult to brown using Gluten-free flour hopefully the cornstarch in the flour helps). Ensure you lift the chicken allowing the oil/butter mix to be between the chicken and the pan)
Transfer the chicken to a plate and tent loosely with foil
Step 4. Build the sauce in the pan
Pour the white wine and the “Certified gluten-free” chicken stock into the hot pan.Use a wooden spatula to scrape up the flavor packed brown bits stuck to the bottom of the pan.
Bring the mixture to a simmer and let it reduce by about half (approx. 4-5 minutes)
Once reduced, remove the pan from the heat and “Mount” or “Monter” the sauce add the 3 pats of cold butter. Stir or whisk and swirl the mixture until the butter melts until the sauce comes together (emulsifies) then place the pan back on the stove on low heat.
Drain and rinse the capers and add to the pan and stir.
Step 5. Finish and coat
Taste the sauce and adjust salt as needed. At this point begin to stir and whisk in your lemon juice to taste.
Return the chicken cutlets to the skillet, coating them in sauce. Spoon sauce over the top, warming the chicken in sauce and watch the sauce thicken.
Step 6. Serve
Plate the warm Piccata immediately.
Spoon the pan sauce generously over the top of the chicken.
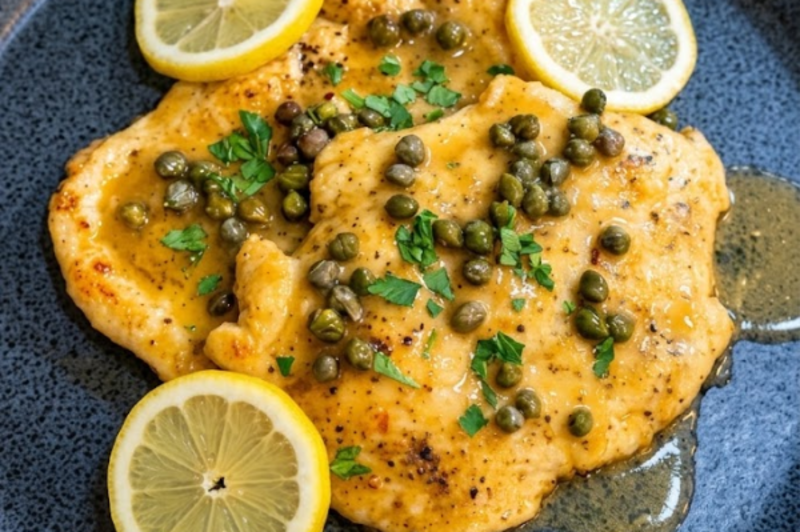
Garnish with fresh lemon slices over the top of the chicken or wedges alongside and chopped parsley.
Estimated Nutritional facts
Per serving I 1 cutlet with sauce
380 calories I 31g Protein I 11g Carbohydrates I 22g Total fat(10g saturated fat) I 105mg Cholesterol
430mg sodium I 1g Fiber I 1g Sugars